Part 3) Hiwin linear rail mounted onto openbuilds cbeam X axis

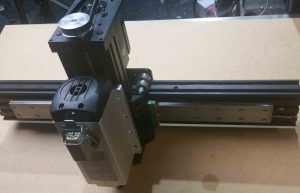
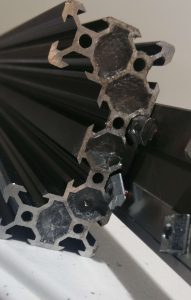
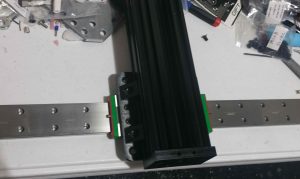
Hiwin Linear rail mounted onto openbuilds cbeam X-Axis

The install of the Hiwin Linear rails onto openbuilds cbeam wasn’t plug and play, it required some grinding of the v-slot by 2mm so t-nuts could slide onto the profile. I took my time doing this because the grinder could easily destroy the profile. overall it came out okay besides from a few scratches here and there.

openbuilds hiwin linear rail

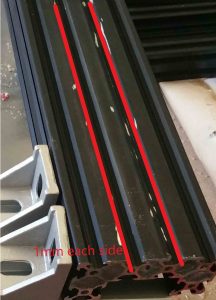
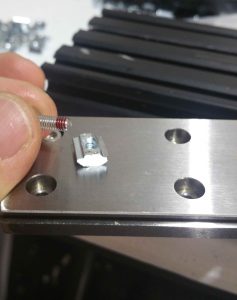
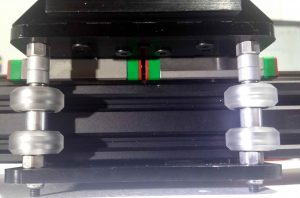
Below image shows 1mm sanded from the outer edge of the T-nuts. This is required to slide the rail onto the profile.

openbuilds hiwin linear rail fitting

lastly some loctite to every bolt and slide it on like a glove.

lock tight to secure each bolthiwin mgw15h fitting to profilefinished rail onto cbeam

The Hiwin MGW15H rail fitted onto the c-beam adds a lot of extra strength and rigidity to the X Axis.

(Hiwin Rail measures at 10mm thick by 40mm wide by 500mm long harden steel).

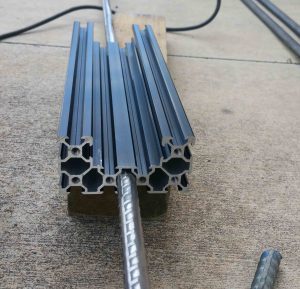
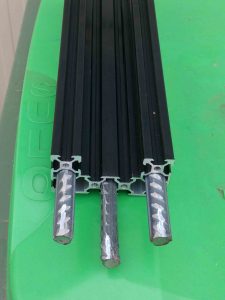
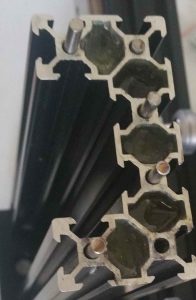
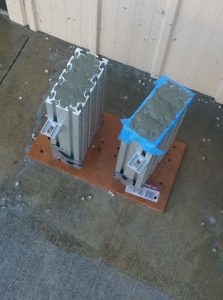
combined with c-beam profile with x3 steel rods through it with epoxy + sand.

  1. Cost of Hiwin MGW15H Est:$200-$300
  2. Would I do it again?  Yes, though there is a Chinese version for 1/3 the cost if anyone has used that id love your feedback.

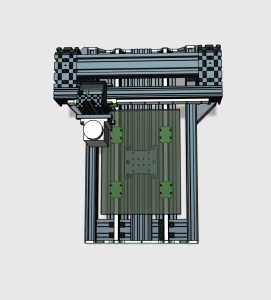
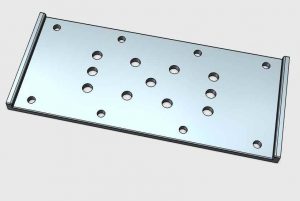
Custom gantry plate to merge X axis to Z axis

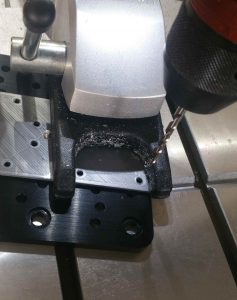
For this process I used a 3d printed template for a drill guide which worked out well. Below is a image of the stl i made (if you require then please email me)

stl of drilling template

Its always good using my 3d printer for cheating methods like this. But always measure everything 3 times and drill once.

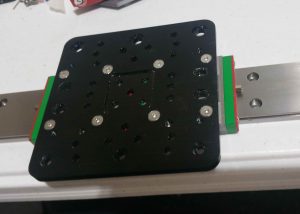
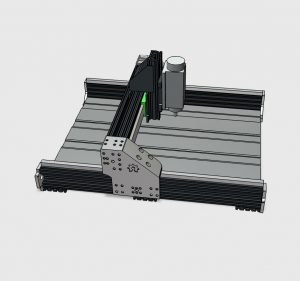
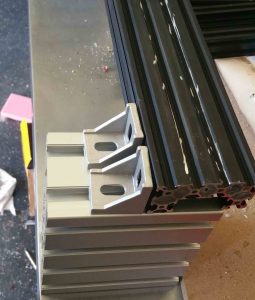
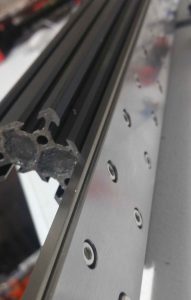
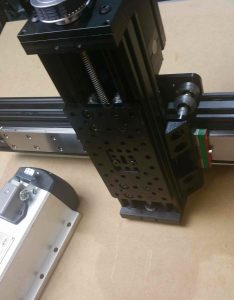
Above image shows x2 mgw15h tracks mounted to openbuilds xl gantry plate.

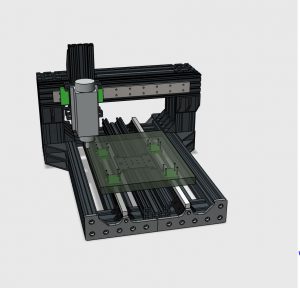
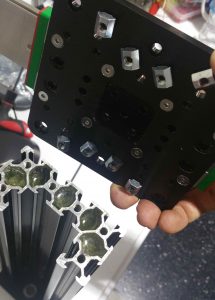
Bolting X and Z axis together

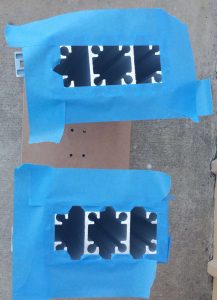
Okay last part was pretty straight forward just need to bolt everything together as you can see in the photos.

bolting up z axis to x axis

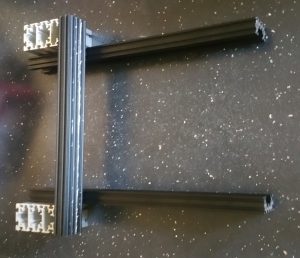
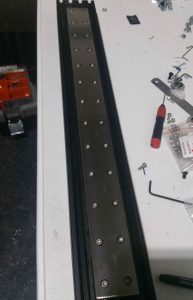
above image shows z axis profile, as you can see all the channels are filled with epoxy and 3 of them have 12mm steel rods through the profile.

bolting up z axis to x axis


bolting up z axis to x axis bolting up z axis to x axis

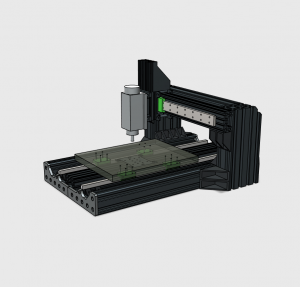
The moment of truth!.. Bam! everything lined up perfect.

bolting up z axis to x axis

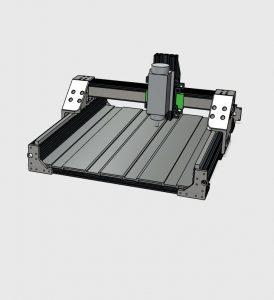
all done and ready to bolt onto the frame of the machine

Z + X axis complete

I’m happy that everything turned out to plan.

Part 4) Hiwin Rails HGW15 cbeam Y-axis leadshine hybrid Nema 23

Part 2 C-beam CNC Rigidity Epoxy filled Profiles

This part of the build was looking for the cheapest way to boost the frames rigidity and dampening effects so it can handle machining metals.

I decided to use 3 lengths of 12mm reo rod that was purchased cheaply from the local hardware store which i glued in with epoxy resin. The reo rod diameter was slightly too large for the c-beam profiles so I used an angle grinder with sanding wheel and shaved off 1-2mm off.

Steel reo rod into c-beam profilethree Steel reo rod into c-beam profile

As you can see above the three reo rods fit snug into the profile . The other two empty profiles were filled with a blend of sand, epoxy and steel shavings. Reason I done this was for the extra dampening effects provided from eg over steel rods. doing this mod to the profile adds alot of weight and strength to the c-beam.

Epoxy filled profile with reo rods and sand

Optional mod which wasn’t necessary but I still done anyways, Stainless 4mm rods were inserted with epoxy into the profiles 4mm holes. Only issue with this is I had to make sure it didn’t block the threads at either end of the profile.

prep profile for concrete pour 18160 profile filled with concrete

Pillars were filled with non-shrink grout with added 4-5mm gravel.

18160 profile filled with concrete

overall this mod will boost the cnc rigidity and dampening effects at minimum costs due to the mass of weight of the machine. Happy with the results.


Part 3) Hiwin linear rail mounted onto openbuilds cbeam X axis

Part 1 Behemoth c-beam cnc Design phase

open builds c-beam behemoth hiwin rails eg

Part 1) The Design process behind the Behemoth C-Beam desktop size Bridge milling machine

Openbuilds c-beam platform by Mark Carew was the inspiration behind my design so thanks guys and hopefully I can contribute back to the community with my build ideas. I finally decided to build my behemoth c-beam mid-2017, originally was going to build the Sphinx style moving gantry router 750×500 but during my Cad design process & planning I started to realise with my mods I had planned the extra weight would effects the machines quality (X axis was going to weigh over 20-30 kilos)

front viewPlasma c-beam cnc Sphinx c-beam cad design

My end goal for this machine was to produce the good quality alloy parts so sacrificing build size for extra rigidity and easy of calibration was a no brainier, but I must admit if it wasn’t for Kyo Sphinx build I probably wouldn’t have started this venture so if you read this Kyo, thanks mate. So even though I had already ordered the parts for a sphinx build I went back to my cad software and started from scratch on a fixed Gantry design that soon turned into what I nicknamed the Behemoth C-Beam from its oversized pillar beams and mass of weight from all the epoxy granite + steel rods threw the pillars

test fitting c-beam on 80x160 profile testing my cad design with scraps

Mocking up bridge with c-beam using some scrap 80160 profiles I had gave me the direction I wanted to go with my build

my 1st behemoth design

Above image was my 1st stage to my behemoth design but I went through subtle changes over the coming weeks. Frame design changed from using c-beams + 2080 to using 4080 profiles for extra strength and dampening effects from the larger profiles. I still plan to use the c-beams for xyz actuators paired up with genuine hiwin rails (MGW15H + HGW15C)

Final Design

Cad drawing of C-beam cnc behemoth Top view of the behemoth cnc

The above image is where the project is headed and overall I’m pretty happy with all the changes. Though due to my design changes I’ll have enough spares to build another c-beam, mini mill or plasma table which could be a future project. 😉

front view of Behemoth C-Beam cnc c-beam x axis mounted with hiwin rails

http://diycnc.com.au/part-2-c-beam-cnc-rigidity-epoxy-filled-profilesbehemoth/